
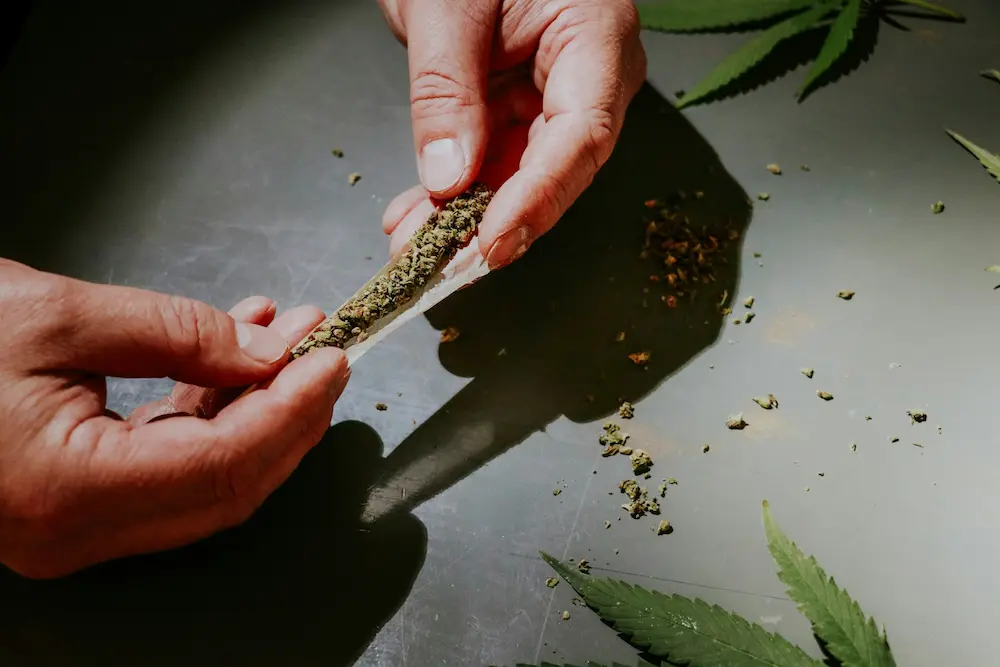

The Anatomy of a Perfect Roll: Getting Started
Rolling a joint is both a functional skill and an art form. Whether you are a beginner picking up papers for the first time or a seasoned enthusiast looking to refine your technique, mastering the roll ensures an even burn, smooth airflow, and a superior smoking experience.
This comprehensive guide covers everything you need to know about joint rolling techniques, from essential gear prep to step-by-step rolling, visual anatomical diagrams, and troubleshooting common issues.
What is a Joint? Understanding the Basics
Before diving into rolling techniques, it helps to understand what is a joint.
A joint is ground cannabis rolled inside a thin paper wrapper, usually featuring a filter (also called a crutch, tip, or roach) at the mouthpiece. Unlike blunts (rolled in tobacco leaves or hemp wraps) or spliffs (which mix cannabis with tobacco), a traditional joint consists purely of cannabis wrapped in paper.
The Anatomy of a Joint
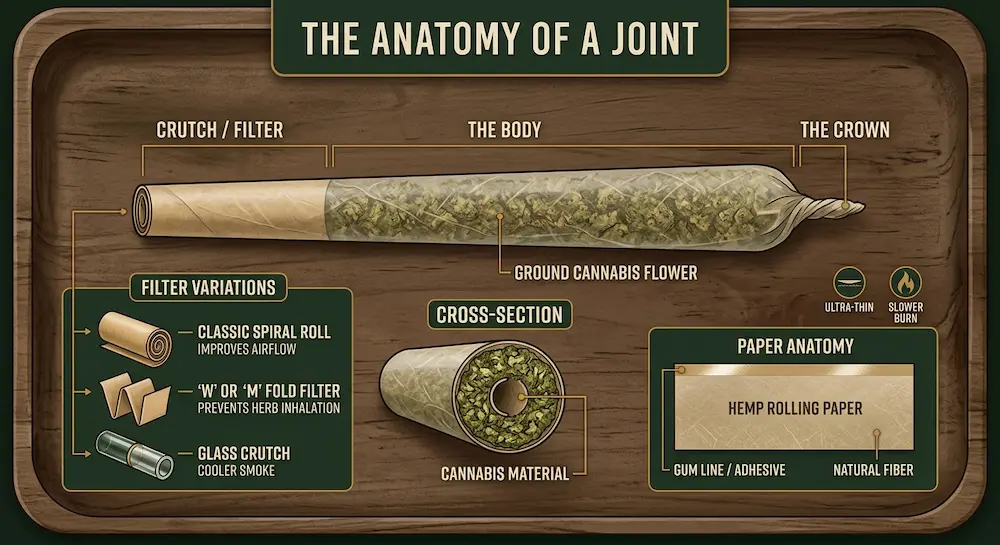
A well-crafted joint consists of four essential parts:
- Rolling Paper: Ultra-thin paper (hemp, rice, or unbleached wood pulp) with a strip of natural gum line.
- The Filter (Crutch): A rolled piece of thick paper at the mouthpiece that provides structure, prevents plant material from entering your mouth, and keeps the airflow open.
- The Ground Flower: Properly cured cannabis ground to a medium-fluffy texture. (To learn more about curing dry herbs for optimal burn quality, explore our guide on Curing Cannabis
- The Sealed Seam: The wet-and-tucked adhesive strip that seals the paper shut.
Essential Tools & Setup
Having the right accessories on hand makes the rolling process significantly easier and cleaner.
| Equipment | Purpose & Recommendations |
|---|---|
| Rolling Papers | 1¼ size (great for beginners) or King Size. |
| Filter Tip | Cardstock filter strips, paper tips, or reusable glass tips. |
| Herb Grinder | 3-piece or 4-piece metal grinder for consistent texture. |
| Rolling Tray | Catches stray material and keeps your station clean. |
| Packing Tool | A poker, pen tip, or small wooden stick. |
Gear Check: Browse our full collection of premium grinders, rolling papers, and rolling trays to stock up your setup.
Step-by-Step Guide: How to Roll a Classic Straight Joint
Follow this step-by-step master method to roll a standard, perfectly burning joint.
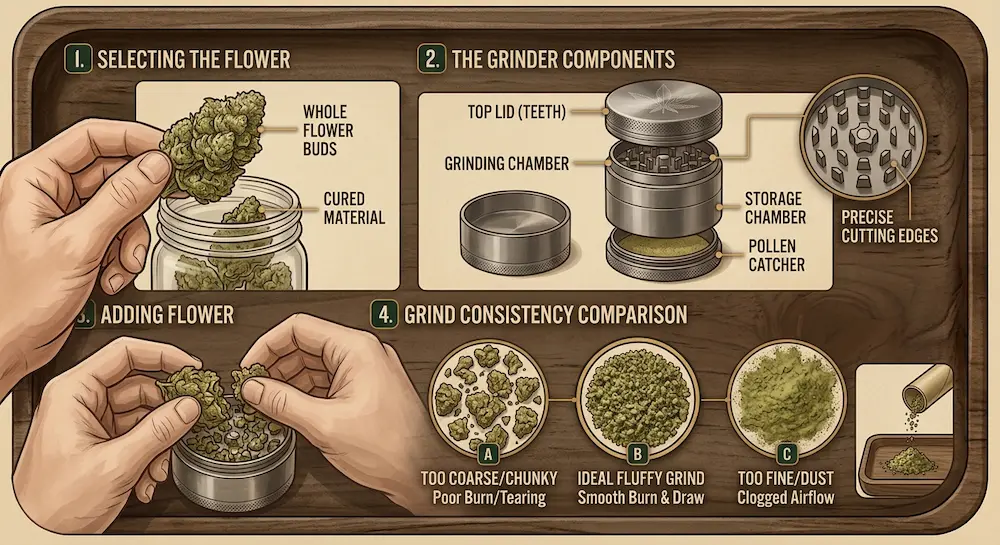
Step 1: Prepare and Grind Your Herb
Place your cannabis into a quality grinder. Grind to a medium-fluffy consistency—similar to coarse salt or dried oregano.
- Too coarse: Causes uneven burning (canoeing) and tears in the paper.
- Too fine/dusty: Clogs airflow and makes drawing smoke difficult.
Step 2: Craft Your Filter (Crutch)
Take a strip of thick paper cardstock. Make 3 to 4 small accordion folds (1/8 inch wide) on one end to form a "W" or "M" pattern, then roll the remaining strip tightly around the accordion.
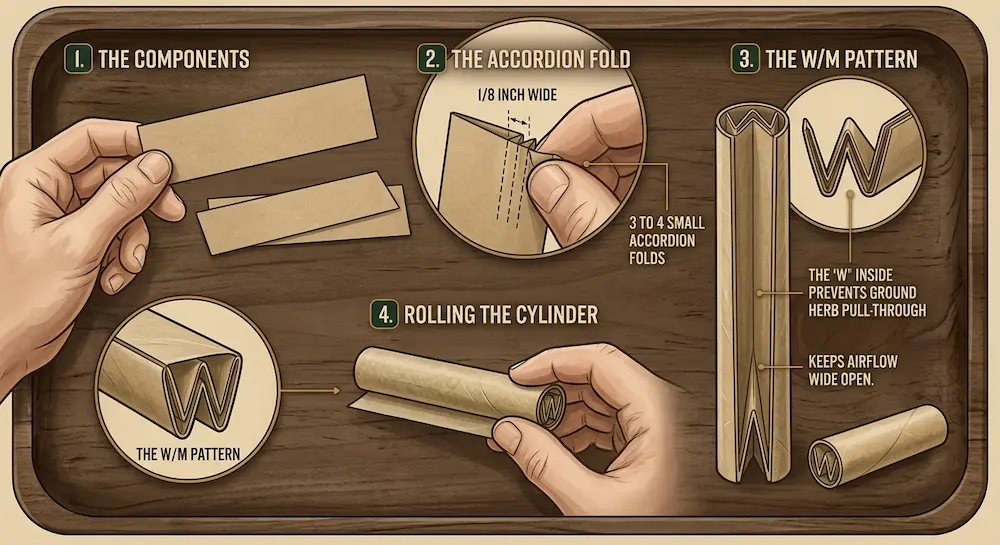
The "W" inside the filter prevents ground herb from pulling through into your mouth while keeping airflow wide open.
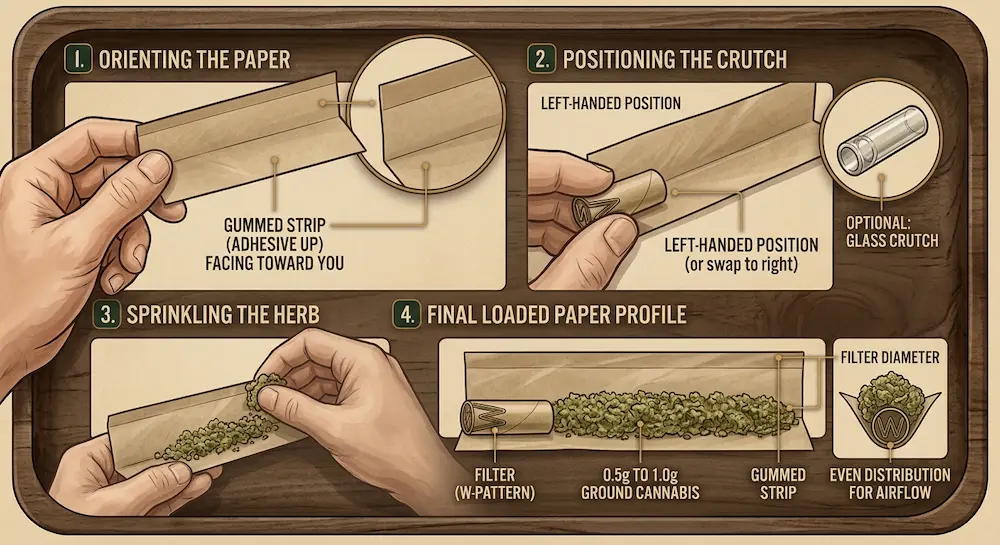
Alternative Option: While paper cardstock is the most common choice, reusable glass or ceramic crutches are also popular options. They provide a sturdy mouthpiece and offer slightly cooler smoke.
Step 3: Load the Paper and Position the Crutch
- Hold the rolling paper with the gum line (adhesive strip) facing up and facing toward you on the top edge.
- Place your filter tip at one end of the crease (left or right, depending on your dominant hand).
- Sprinkle approximately 0.5g to 1.0g of ground cannabis along the crease.
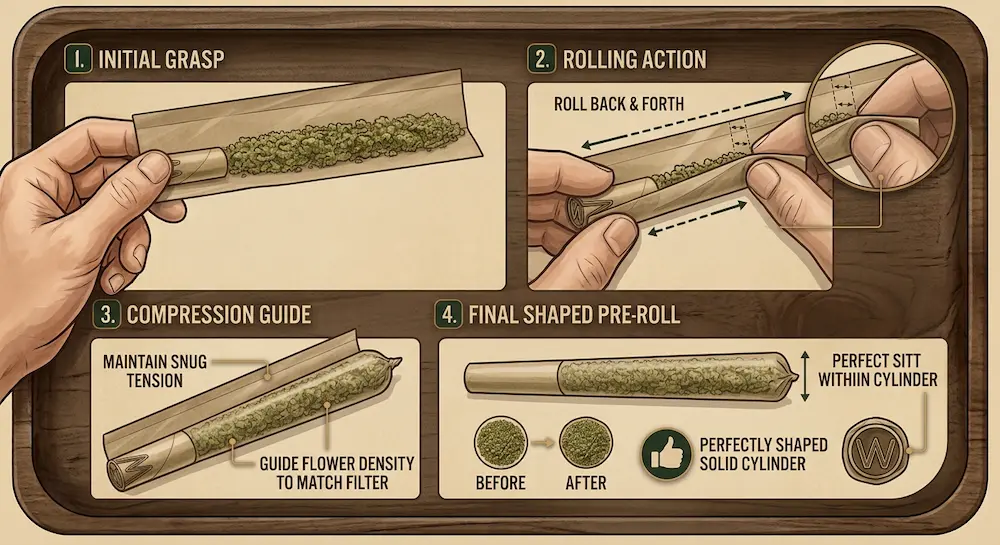
Step 4: Pre-Shape the Joint (The Pre-Roll)
Grasp the paper between your thumbs and index fingers. Roll the paper gently back and forth, compressing the cannabis into a firm, solid cylinder. Do not press too hard; guide the shape so the herb matches the diameter of your filter.
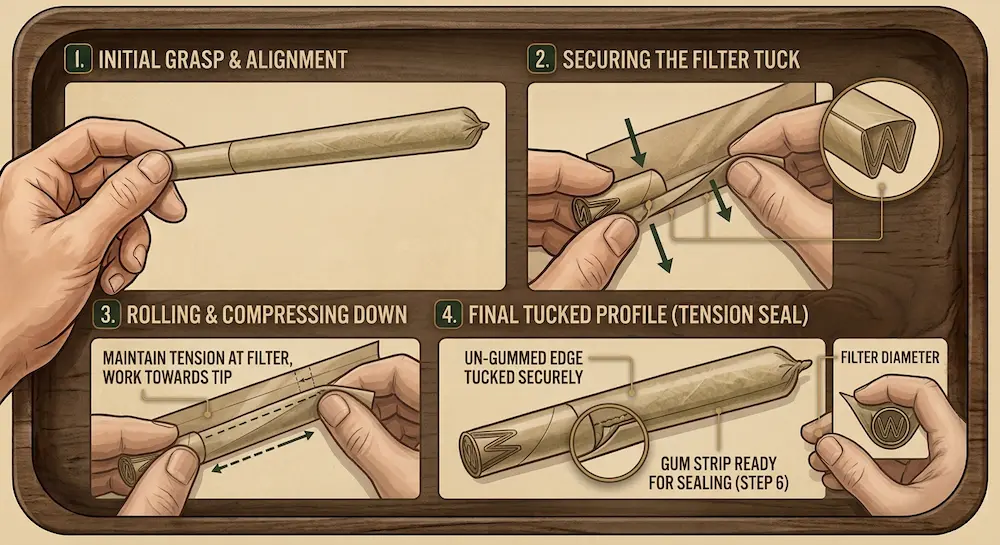
Step 5: The Tuck and Roll
This is the critical moment in joint rolling techniques.
- Roll the un-gummed lower edge of the paper over the herb and tucked down behind the filter.
- Use your thumbs to secure the tuck at the filter end first, working your way down to the lighting tip.
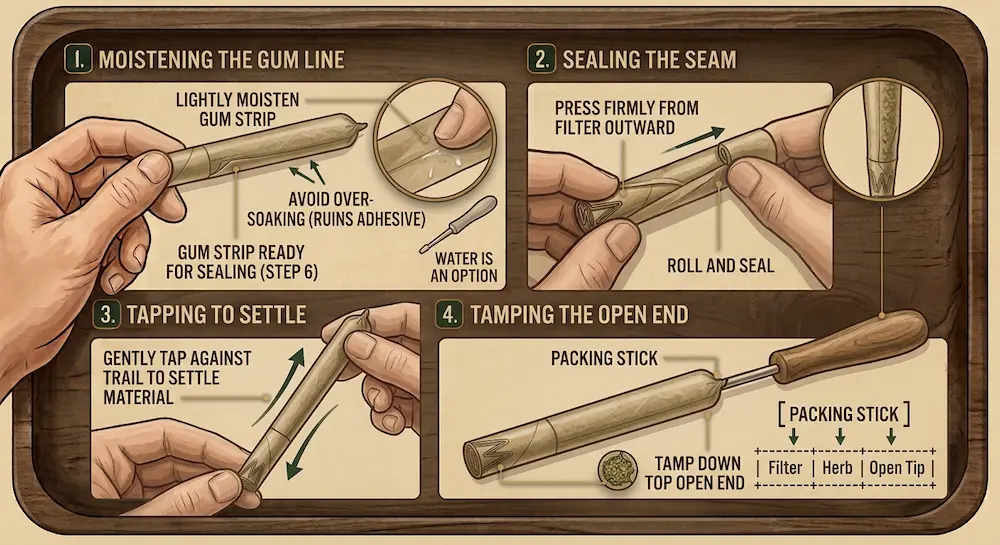
Step 6: Lick, Seal, and Tamp
- Lightly moisten the adhesive gum line with saliva or water. (Avoid over-soaking, which ruins the adhesive strip).
- Roll the paper up over the adhesive and press firmly from the filter end outward to seal the joint.
- Stand the joint vertically on its filter and gently tap it against your table or rolling tray to settle the material. Use a packing tool to lightly tamp down the top open end.
Step 7: Twist or Flat-Top the Crown
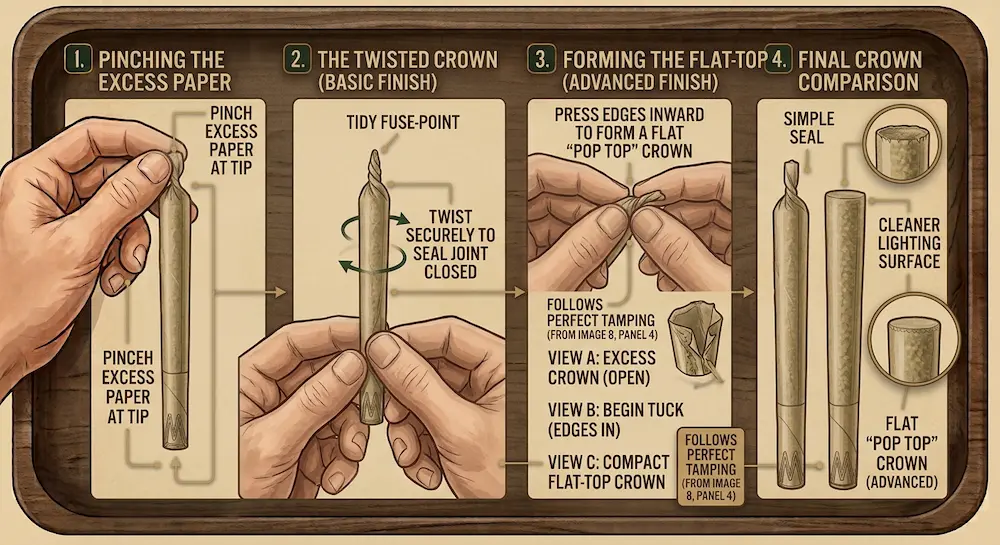
Twist the excess paper at the tip to seal the joint closed. For an advanced finish, press the edges inward to form a flat "pop top" crown, which allows for a cleaner lighting surface.
Advanced Joint Rolling Techniques
Once you have mastered the classic straight roll, expand your skills with these popular advanced variations.
| Technique | Skill Level | Key Feature |
|---|---|---|
| The Cone | Intermediate | Tapers narrow at the filter, wide at the tip. |
| The Dutch (Backroll) | Intermediate/Avid | Burns excess paper for cleaner flavor. |
| The Cross Joint | Advanced | Two intersecting joints lit simultaneously. |
1. The Cone Joint
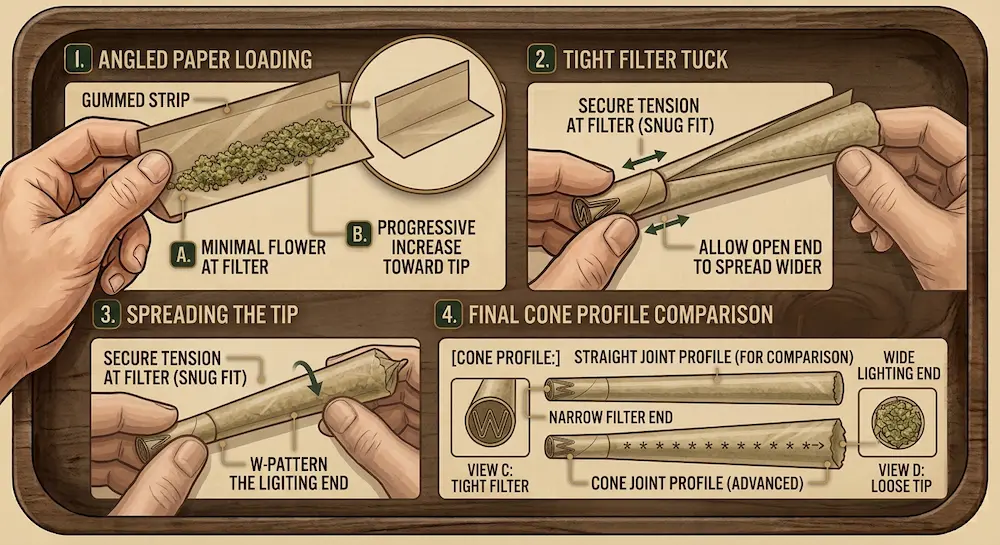
The cone shape accommodates more herb near the lighting end, creating richer hits that smooth out as the joint burns down.
- Technique: Angle your paper slightly diagonally when packing. Use less flower near the filter and progressively more toward the tip. When rolling, tuck the paper tightly at the filter while allowing the open end to spread wider.
2. The Dutch Backroll (Inside-Out Roll)
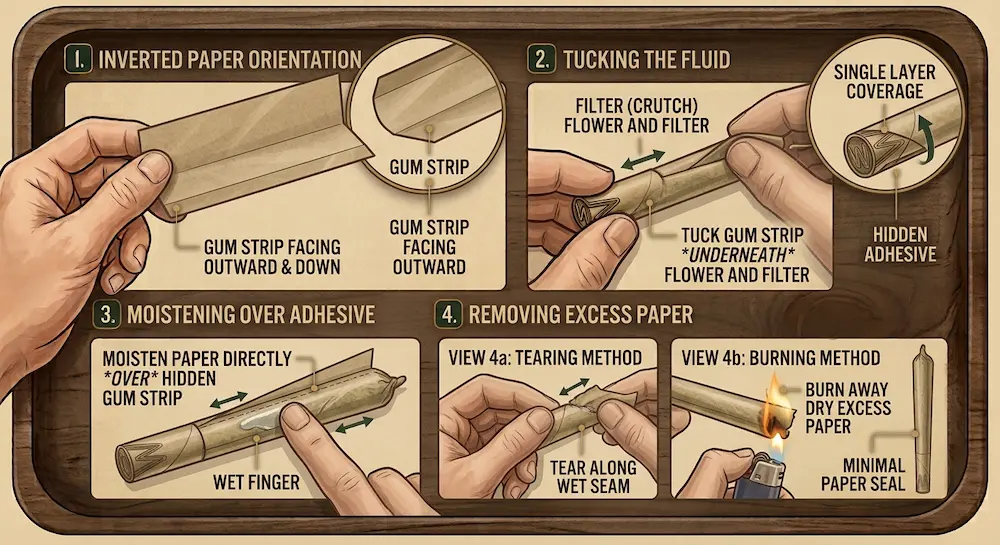
Ideal for purists who want to smoke as little paper as possible.
- Technique: Turn your rolling paper upside down so the gum line is at the bottom, facing outward toward you. Roll the joint normally, but tuck the paper so the glue strip seals underneath a single layer of paper. Moisten the paper directly over the hidden glue strip to adhere it, then burn or tear off the excess paper flap.
3. The Cross Joint
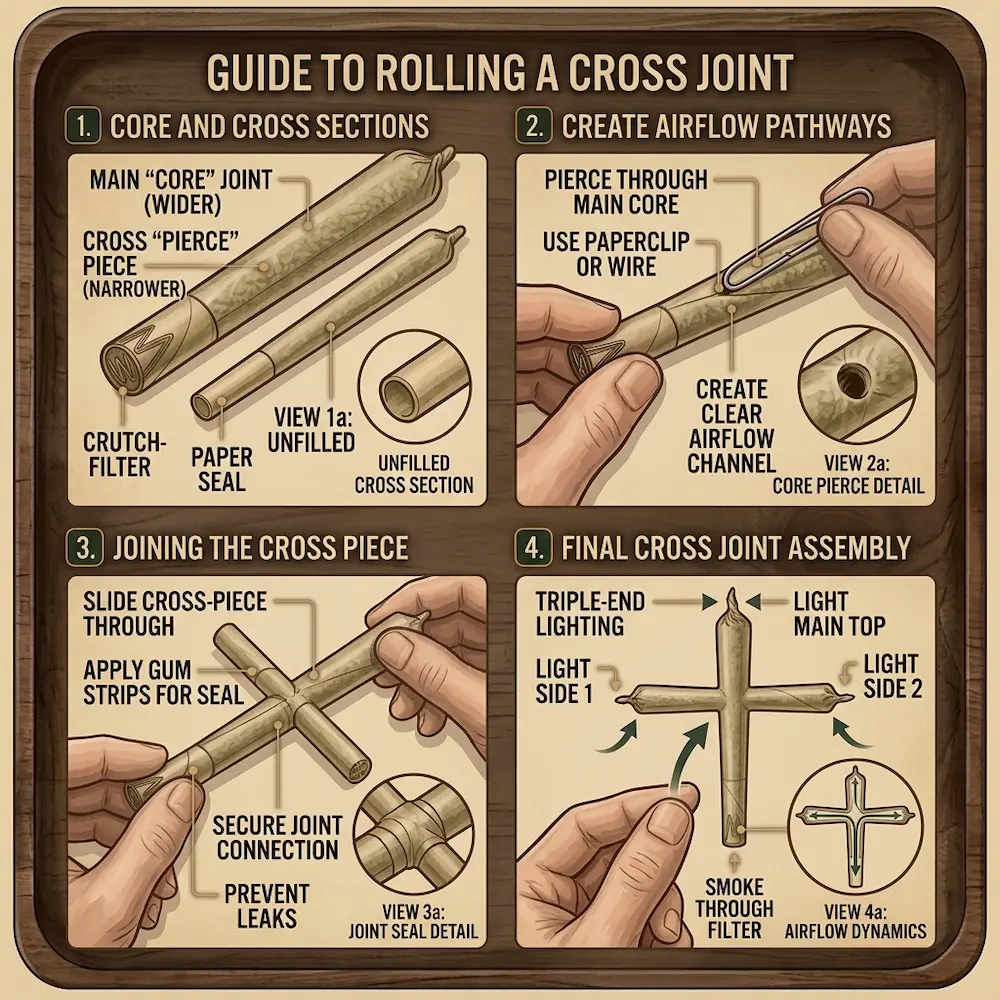
Famous for party settings, this cross-shaped joint burns three tips simultaneously.
- Technique: Roll one thick primary joint with a filter and one thin secondary joint without a filter. Poke a small hole 3/4 of the way up the main joint using a needle, then push the thinner joint halfway through. Poke a small air hole through the center intersection point and wrap adhesive strips torn from extra papers around the cross-joint seal to make it airtight.
Troubleshooting & Pro Tips
Even experienced rollers run into issues. Use this quick reference guide to fix common problems:
| Problem | Root Cause | Fast Fix / Solution |
|---|---|---|
| Canoeing (Side Burn) | Uneven grind or loose packing. | Apply saliva under the fast-burning side. |
| Hard Draw / Clogged | Packed too tightly or wet tip. | Gently massage the joint to loosen herb. |
| Loose / Drooping | Tuck wasn't tight at filter. | Use a packing stick to condense herb. |
| Unravelling Seam | Glue was under or over-moistened. | Re-moisten a gum strip & patch the seam. |
Lighting Like a Pro
To ensure a perfect burn from the start:
- Toast the tip: Hold the flame slightly away from the tip without inhaling directly, rotating the joint to roast the crown evenly.
- Puff gently: Once the tip is glowing red, take soft, short puffs while rotating the joint to establish an even cherry.
Summary Checklist
To roll a smooth, even-burning joint every time, follow this checklist:
- Grind even: Aim for a fluffy, medium grind.
- Build a solid filter: Use an accordion "W" fold (or a glass crutch) for clean airflow.
- Master the tuck: Keep tension snug against the filter.
- Tamp & seal: Lightly press the flower down and avoid over-saturating the gum.
Equip yourself with high-grade papers, grinders, and trays at Shop and practice your technique—rolling gets easier with every attempt!