
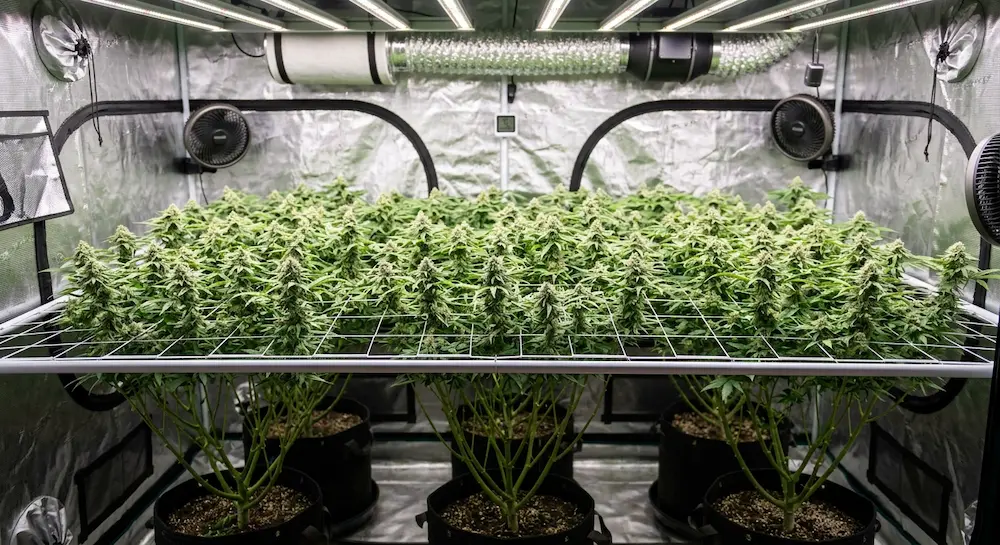

What Is Screen of Green (ScrOG) and How Does It Work?
Whether you are cultivating in a compact grow tent or maximizing a dedicated indoor space, indoor growers constantly face one fundamental constraint: usable light footprint.
Left to grow naturally, a cannabis plant exhibits apical dominance. It concentrates most of its energy into a single central main stem (the primary cola), leaving lower branches shaded and underdeveloped as smaller, wispy "larf".
The Screen of Green (ScrOG) method breaks this natural hierarchy. By using a horizontal mesh screen, ScrOG redirects vertical growth horizontally across a screen grid. The result is a uniformly illuminated plane where dozen of secondary bud sites turn into robust, top-tier colas.
Why ScrOG Works: The Science of Canopy Uniformity

In a standard grow, placing an overhead LED or HPS light source over a Christmas-tree-shaped plant creates an intensity gradient: the top tip gets optimal photon flux (PPFD), while middle and lower branches receive exponential drops in light.
Key Benefits of the ScrOG Method:
- Maximum Light Penetration: By keeping all growing tips at the exact same height from the light fixture, every single flower site sits in the light’s "sweet spot".
- Significant Yield Boost Per Plant: Growers routinely report 20% to 50% yield increases per plant compared to untrained setups.
- Lower Plant Count Efficiency: Ideal for regions with legal limits on plant counts. One single photoperiod plant in a long vegetative cycle under a ScrOG net can easily fill out a 3×3 ft or 4×4 ft tent footprint.
- Enhanced Airflow & Microclimate Control: Elevating the main growth canopy and removing lower foliage drastically reduces stagnant air pockets, lowering the risk of Powdery Mildew (PM) and bud rot (Botrytis).
Essential Equipment Checklist
Setting up a ScrOG rig does not require expensive gear, but selecting the correct materials makes daily maintenance much easier:
| Component | Recommended Specifications | Purpose |
|---|---|---|
| The Screen/Mesh | Nylon trellis net, hemp string, or PVC/wood frame with string. Grid size: 2"–4" (5–10 cm) squares. | Holds and routes branches horizontally. Avoid sharp wire that can slice stems. |
| Containers | 5 to 7-gallon Fabric Pots | Promotes root air-pruning and offers grommets/rims for early Low-Stress Training (LST) ties. |
| Lighting | Modern Full-Spectrum LED Panels | Delivers even PPFD distribution across a flat canopy without extreme heat spots. |
| Plant Ties & Pruners | Soft rubberized garden ties and curved micro-tip shears. | Secures stubborn shoots to the screen and enables precise defoliation. |
Find our handpicked growing equipment and grow lights.
3. Step-by-Step Guide: From Vegetative Stage to Harvest
Successful ScrOG growing depends heavily on correct timing. You cannot simply drop a net on top of a flowering plant and expect top results.
-
Early Veg: Topping and Low-Stress Training (LST)
Target: Weeks 3 to 4 of Veg
Begin by topping your plant when it reaches 4 to 6 nodes. Cut the main stem above the node to break apical dominance, forcing energy into lateral side branches. As side branches grow outward, gently tie them down toward the edges of the pot using garden wire to widen the plant base early. -
Screen Installation
Target: Late Veg
Mount your screen roughly 8 to 15 inches (20 to 40 cm) above the top of your container rim. Ensure the frame is firmly anchored to tent poles or wall supports. Allow your foliage to grow up through the screen before initiating horizontal training. -
The Weave and Tuck Phase
Daily Maintenance in Late Veg
As individual branches grow 2 to 3 inches above the grid, gently pull them back down underneath and redirect them into adjacent empty squares, moving from the inside outward. Spread out outer branches toward the corners and edges to fill out empty real estate. -
The 12/12 Flip & Flowering Stretch
Target: Canopy filled to roughly 65%–70%
Flip your indoor lighting schedule to 12/12 when your screen is roughly 65% to 70% full. During the first 2 to 3 weeks of flowering (the stretch phase), plants will rapidly double in length. Continue tucking branches horizontally to fill out the remaining open grid spaces. -
Stop Tucking & Execute 'Lollipopping'
Target: End of Flowering Week 2 or 3
Once the stretch phase finishes around week 3 of bloom, stop tucking. Allow the flowering tips to grow straight up into an even carpet of vertical colas. Prune away all leaves, shoots, and small growth underneath the net level ("lollipopping") so the plant sends 100% of its energy to top flowers.
Related Article: Low Stress Training Guide
ScrOG vs. Sea of Green (SOG): What's the Difference?
Newer cultivators often confuse ScrOG with SOG (Sea of Green). While both aim for an even canopy, their execution strategies are polar opposites:
| Feature | Screen of Green (ScrOG) | Sea of Green (SOG) |
|---|---|---|
| Plant Count | Low (1 to 4 plants per m²) | High (9 to 16+ plants per m²) |
| Veg Time | Long (4 to 8+ weeks) | Short (1 to 2 weeks) |
| Training Effort | High (Daily tucking/weaving) | Low (Minimal training) |
| Genetics Ideal | Photoperiod Feminized | Clones / Uniform Strains |
| Primary Advantage | Maximizes yield per plant | Fast turnaround per cycle |
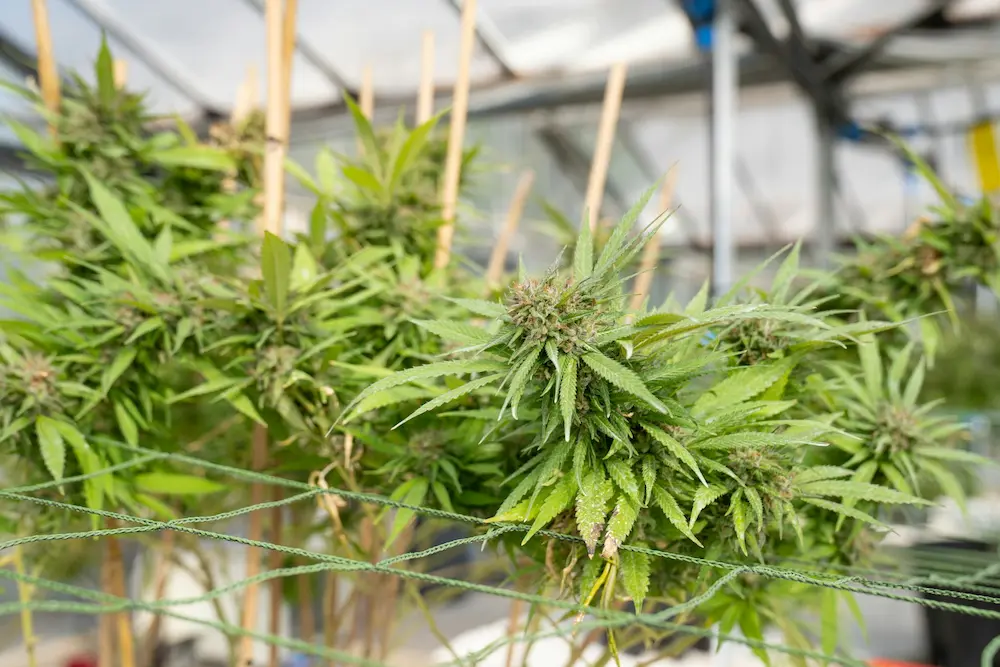
Common ScrOG Mistakes to Avoid
- Attempting to ScrOG Autoflowers: Autoflowering strains operate on an immutable internal genetic clock. Because heavy training and weaving cause temporary growth pauses, autoflowers may enter bloom before filling out the screen, leaving unused space. Stick to photoperiod feminized seeds for predictable results.
- Flipping the Light Cycle Too Late: If you wait until the screen is 100% full before flipping to 12/12, the 2–3 week stretch will cause branches to overflow vertically, creating a crowded mess above the net.
- Rough Handling: Cannabis branches become woodier and more brittle as they mature. Always bend young, pliable growth. If a stem cracks during tucking, immediately wrap the break with painter's tape or garden tie; cannabis stems heal quickly if supported.
- Neglecting Lower Foliage: Failing to strip shaded growth below the screen starves top colas of nutrients and severely restricts under-canopy airflow
Pro-Tips for Maximum Resin and Yield
- Strain Selection: Sativa-dominant hybrids or strains known for high stretch factors excel in ScrOG setups because their flexible branches weave smoothly without snapping.
- Pair with Strategic Defoliation: Combine ScrOG with selective defoliation. Remove large fan leaves that shade developing bud sites along the horizontal run to allow light to penetrate directly onto nodes.
- Manage Relative Humidity (RH): Because a ScrOG canopy creates a thick layer of vegetation, keep exhaust fans running 24/7 and maintain relative humidity around 40%–50% during mid-to-late flowering to prevent mold.
Final Thoughts
The Screen of Green method requires patience during the vegetative stage, but the payoff at harvest is undeniable. By turning single-stem plants into multi-cola powerhouses, you unlock the full efficiency of your lighting, space, and nutrient investment.